 Hey there Fabulous Friends of Flair and Frills! I am so excited to apply for the My Pink Stamper Design Team with Robyn! WOOT WOOT! I have NEVER tried before and you know how I NEED to be on a stamp DT!! I think I've got a good shot-do you?! There sure are a LOT of talented women these days so if the Lord sees that it's not my time, I'll be ok with that because it really is fun to apply and I have a FABULOUS project from it, oh-and Robyn/Karlee is here on MY BLOG to see it!!! This is my entry. It's a layout with photos of the other middle sister Brandis and myself. The challenge was to make a newly created project using your favorite Cricut cartridge and the colors Orange, Turquoise, Green and Brown, plus an additional color of your choice. I added cream and used the 'Cindy Loo' cartridge. My favorite cartridge really depends on what I'm creating, but the cartridges I find I love the most are those with the most versatility-like this one! It has super adorable images, a font feature, alphabet, frames AND borders! Can you guess which features I used?!
 Aren't these deer just darling?! I couldn't help but play on the words! There are 3 layers for each of them and I used the flip feature on my Cricut for the partner. I dry embossed the middle layer with the Brocade embossing folder from Provo Craft and the eyes are accented with a white gel pen, as are the letters and flowers.
 The outside trim is dry embossed as well and I sewed along the inside edge of the background doily piece. It is placed over a striped paper from My Minds Eye's Stella Rose Collection in 'Hattie'. The cream satin ribbon seemed just the right touch for softness with a double layered bow to accent.
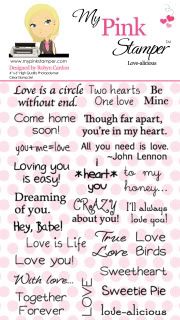
 Here again you see the hand drawn accents with my white gel pen and of course I HAD to work in one of the MPS sets! I used the 'Love-alicious' stamps for this sub-title by cutting them apart to go side by side for this banner. Can you see that all of the cream flowers in the doily are dry embossed with the brocade folder too?! This photo shows some of the stitching along the border as well. You know how I LOVE attention to detail!
 This is the main photo of the 2 of us accented with various pearls in the bottom right corner. I wrote the date with a brown permanent marker just inside the loop of the frame. It didn't really require any additional journaling.
 And again, the completed layout for my submission! It was a lot of work, but anything worth doing well usually is, right?! I hope you've enjoyed stopping by today. Looking ahead this week will be Christmas in July with BLOG CANDY! {HUGS}
Supplies Used:
Brads: Doodlebug in Tangerine
Ink: Close To My Heart, Cocoa
Cardstock: Dark Brown and Teal-American Crafts
Green, Cream and Shimmery Orange-Bazzill
Patterned Paper: My Mind's Eye Hattie Collection in the Stella Rose line
Pearls: Melissa Frances
White Gel Pen: Stampin' Up (It really is the BEST one made)
Embossing Folder: Brocade-Provo Craft
Die Cut Machine: Cricut Expression
Cricut Cartridge: Cindy Loo with Fit to Page Feature, Flip Feature, Frame, Alphabet and Images
Adhesive: Zip Dry by Beacon (My ABSOLUTE FAVORITE)
Other: Ivory Satin Ribbon, Sewing Machine and Cream thread



 I LOVE this layout! It is quite detailed in creation but OH SO worth it! It covers TRIPLE fold as I used